With this widget, you can create scrolling images or logos section.
Required Setup
- Elementor FREE Plugin installed & activated.
- You need to have the WDesignKit plugin installed and activated.
- Make sure you’ve created an account and logged into it.
- Make sure you’ve downloaded the Marquee Logo Wall widget.
How to Activate the Marquee Logo Wall Widget?
Go to
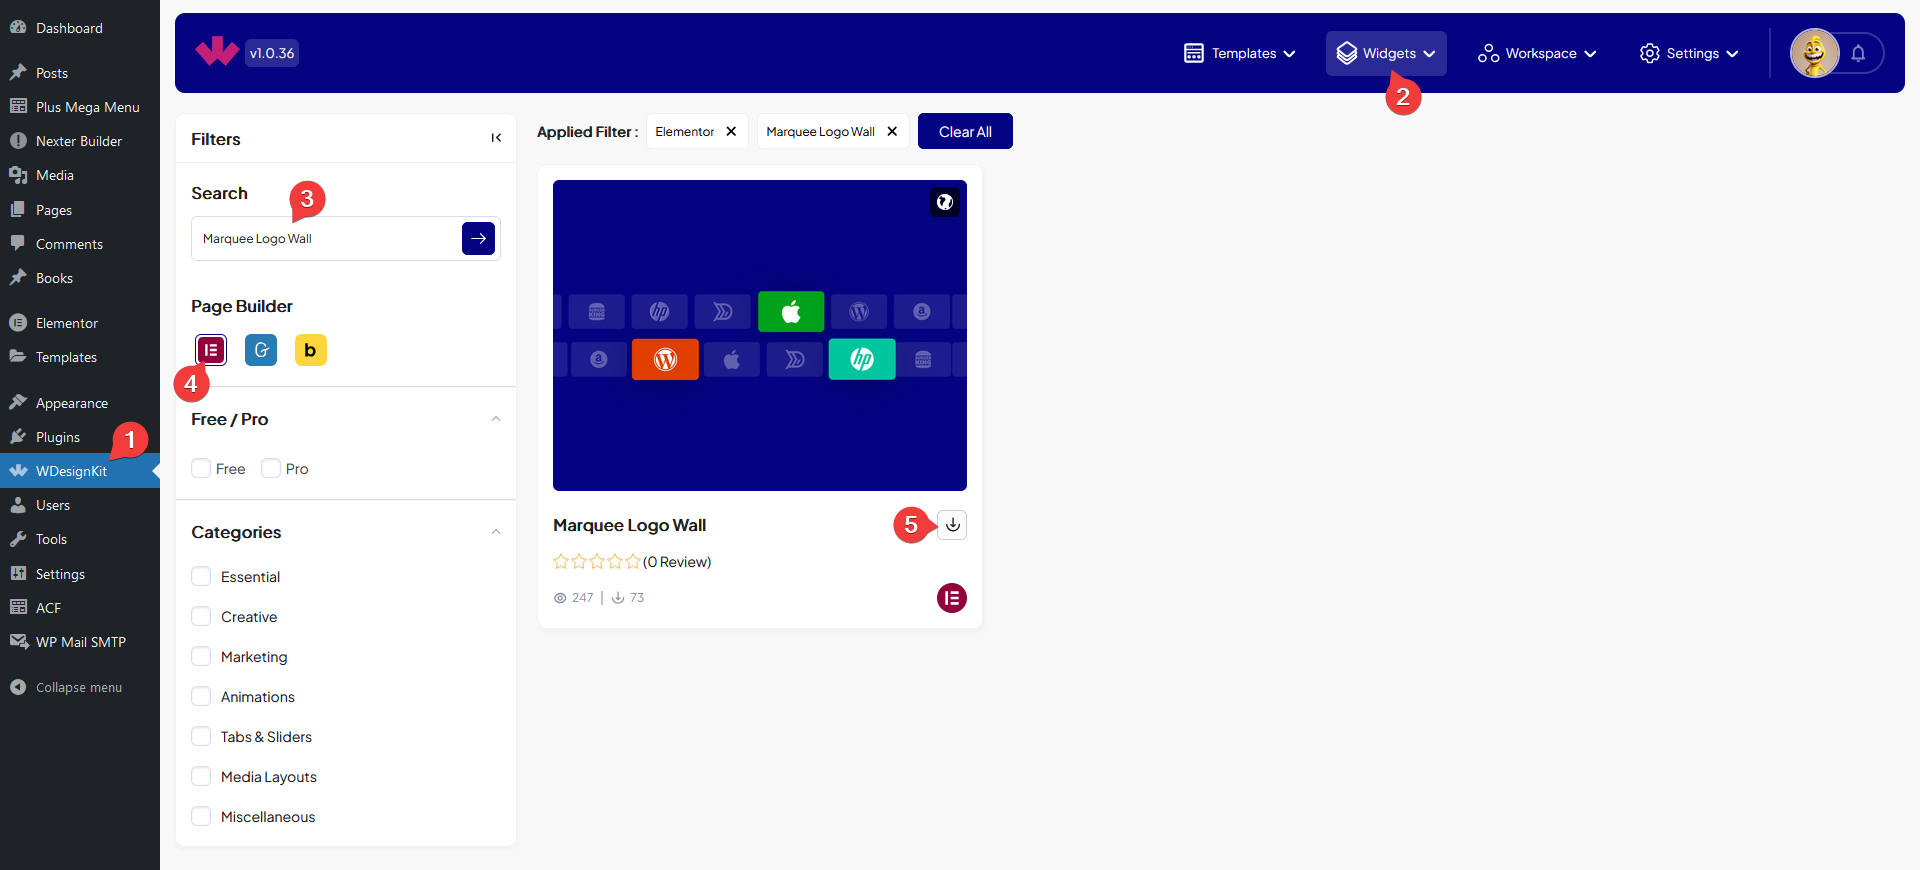
- WDesignKit → Widgets.
- Search the widget name and select Elementor as the Page Builder.
- Click on the Download icon.

How to Use the Marquee Logo Wall Widget in Elementor?
Add the Marquee Logo Wall widget to the page.
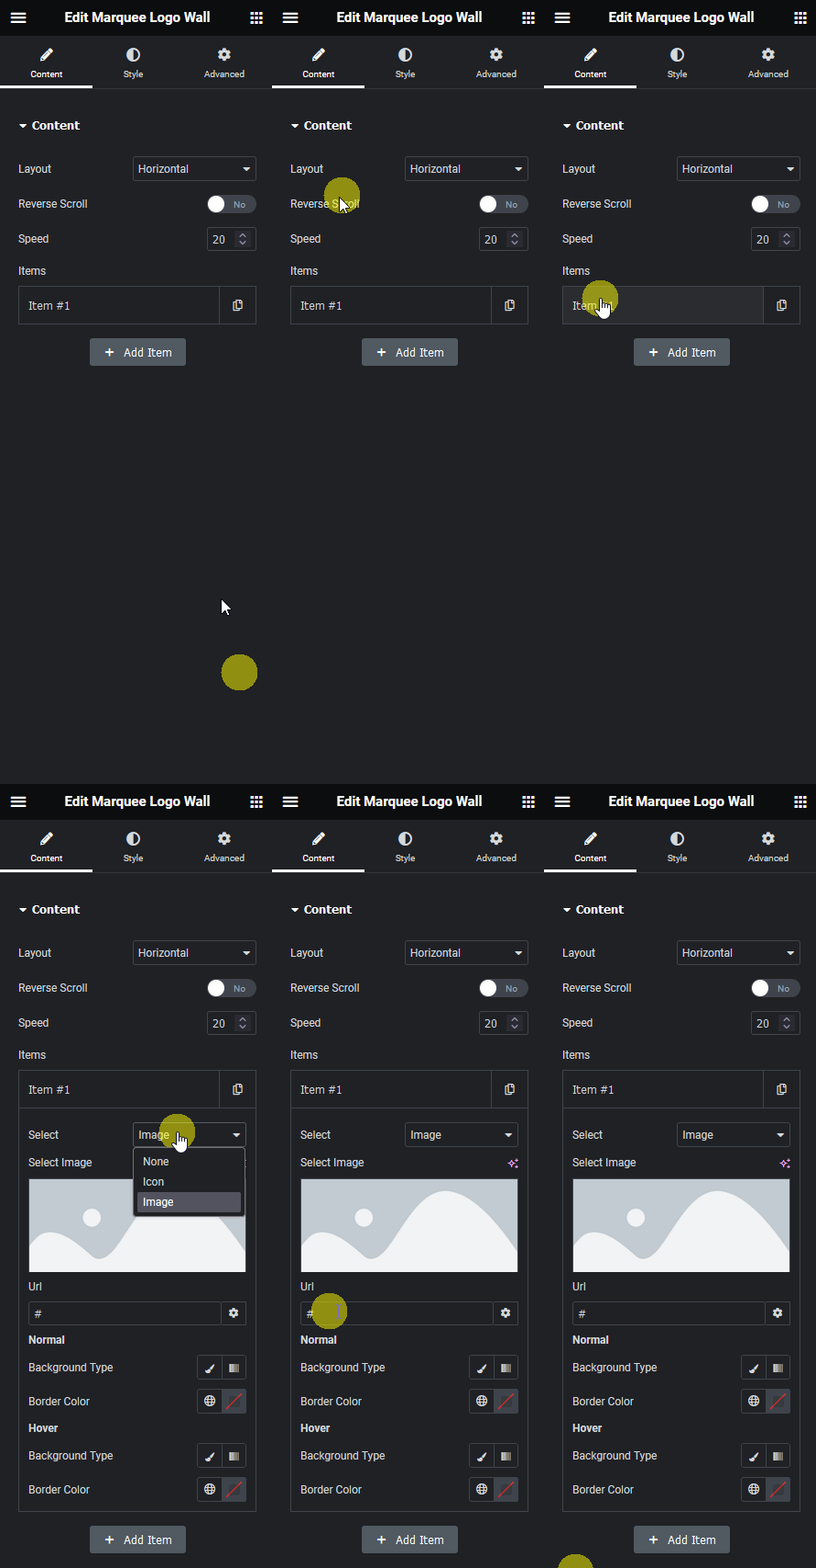
From the Layout dropdown, you have to select the scroll direction. Here you’ll find two options –
- Horizontal – To create a horizontal image scroll.
- Vertical – To create a vertical image scroll.

By enabling the Reverse Scroll toggle, you can reverse the image scroll direction.
From the Speed section, you control the image scroll speed.
From the Items section, you have to add the image items. By default, you’ll find one repeater item, open it.
From the Select dropdown, you have to select the image type. Here you’ll find three options –
- None – To keep the item blank.
- Icon – To add an icon.
- Image – To add an image.
Based on your selection, you’ll find different image upload options.
Then from the Url field, you can add a link to the item.
After that, you can manage the item background and border color for normal and hover states.
You can click on the +Add Item button to add more image items.
From the Style tab, you can manage the image size, height, width and gap of items along with other styling options.
