
With this widget, you can display your site’s navigation in a clean, full-screen overlay for a modern and immersive experience. Users can open the menu with a custom trigger like an icon, text, or hamburger menu, and enjoy smooth transitions that add a dynamic feel. It’s great for artists, agencies, new businesses, or any website that wants a simple and clean look.
Required Setup
- Elementor FREE Plugin installed & activated.
- You need to have the WDesignKit plugin installed and activated.
- Make sure you’ve created an account and logged into it.
- Make sure you’ve downloaded the Full Screen Menu widget.
How to Activate the Full Screen Menu Widget?
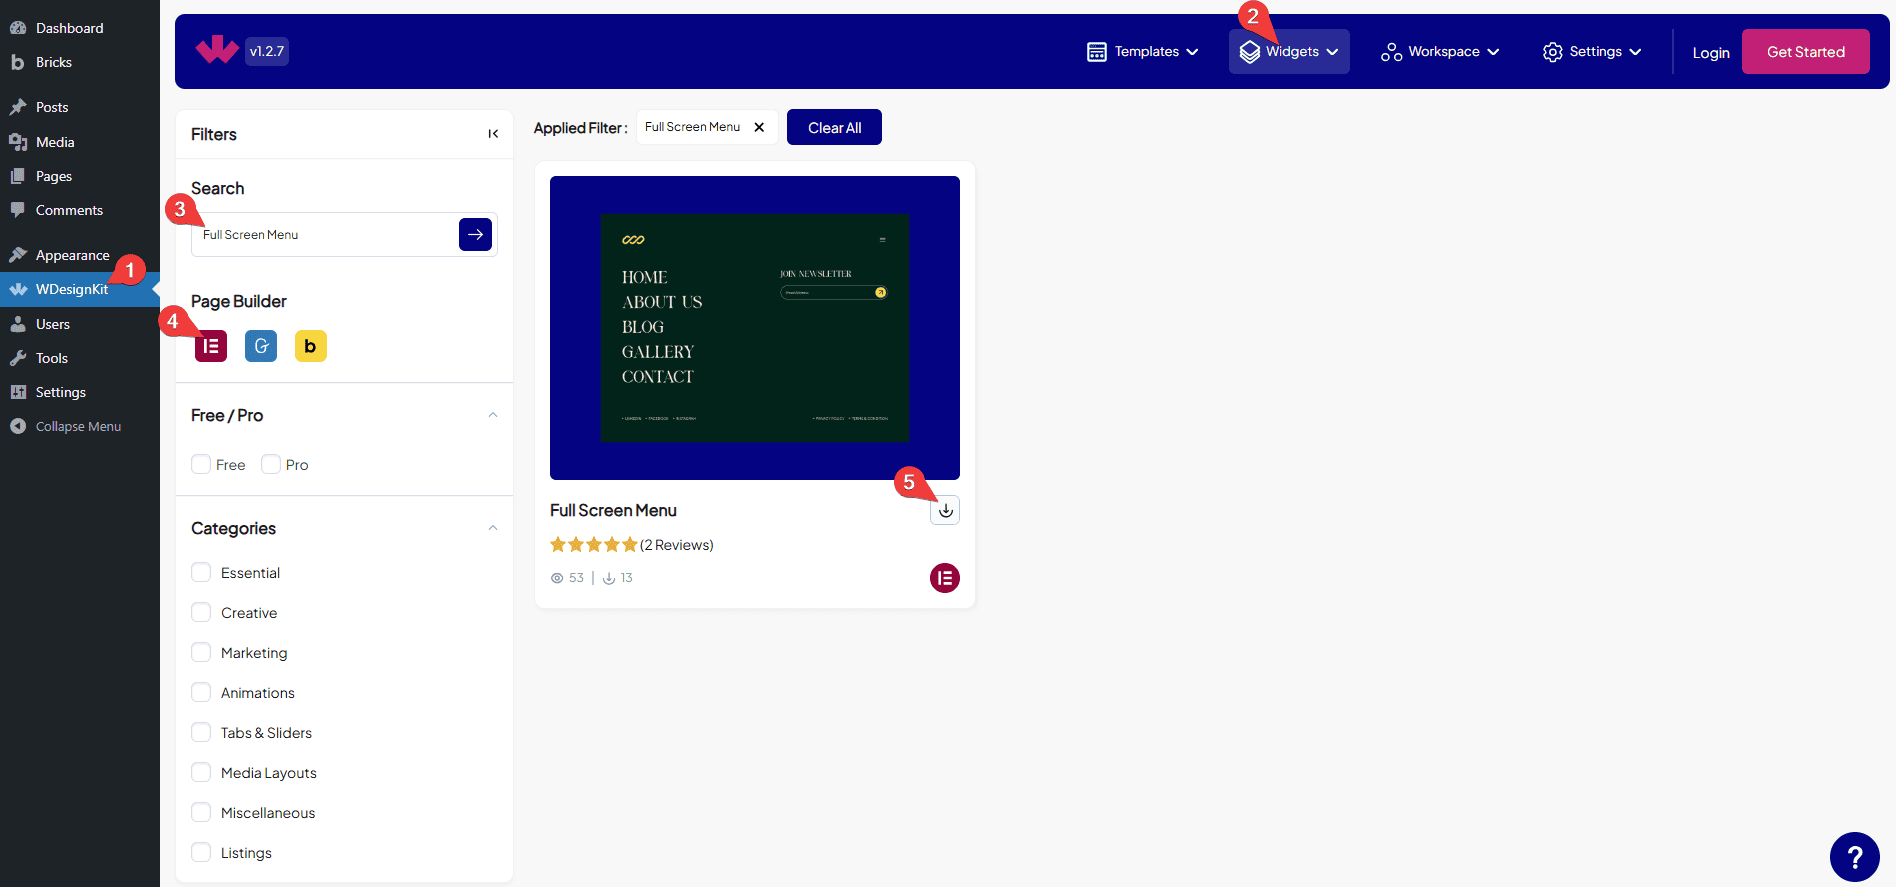
Go to
- WDesignKit → Widgets.
- Search the widget name and select Elementor as the Page Builder.
- Click on the Download icon.
How to Use the Full Screen Menu Widget in Elementor?
Add the Full Screen Menu widget to the page.
Content
From the Style dropdown, you have to select the content style.
From the Site Logo dropdown, you can select the icon type for the site logo. Here you’ll find two options –
Text – You can add an icon or text for the site logo.
Image – You can choose an image for the site logo.
Based on your selection, you’ll find different options for the site logo.
In the Text (Closed) section, you can add the text for the site logo, which will be visible when the menu is closed.
In the Icon (Closed) section, you can add an icon or SVG for the site logo, which will be visible when the menu is closed.
In the Text (Opened) section, you can add the text for the site logo, which will be visible when the menu is opened.
In the Icon (Opened) section, you can add an icon or SVG for the site logo, which will be visible when the menu is opened.
In the Image Logo (Closed) section, you can add an image or SVG for the site logo, which will be visible when the menu is closed.
In the Image Logo (Opened) section, you can add an image or SVG for the site logo, which will be visible when the menu is opened.
Then, in the Site url field, you can add the site URL.
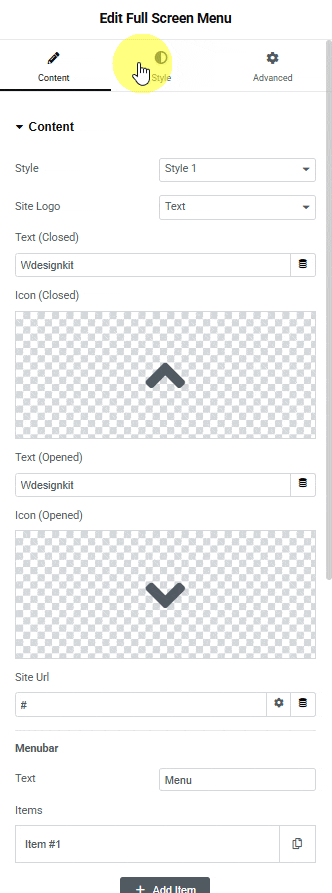
Now, Menubar Heading. In this section, you can create a menu heading for your site and also add different menu items under it.
In the Text section, you can add the text of the menu.
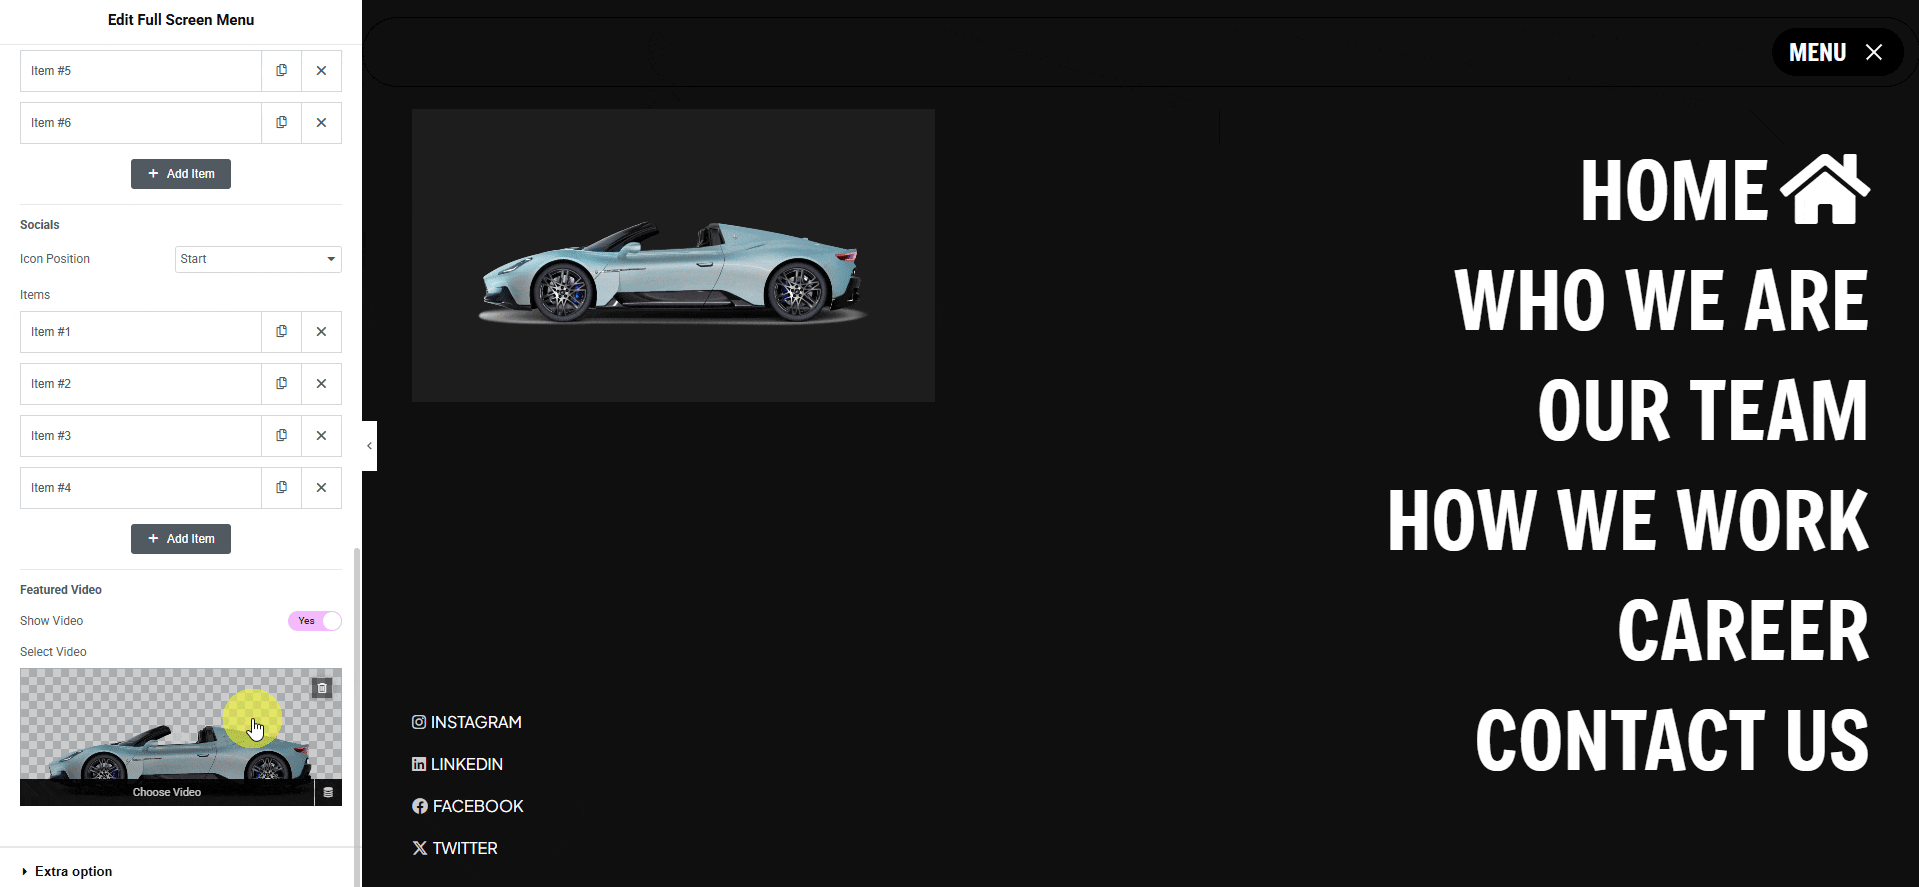
Next, move on to the Repeater section. In this section, you can add multiple menu items for your site. For each item, you can set text, icon, and a URL.
By default, you’ll see one repeater item under the Items section. Open it.
In the Text section, you can add the text to the menu item.
You can add an icon or SVG to the menu item from the Icon section.
Then, in the URL field, you can add the menu item URL.
Then, you can click the + Add Item button to add more items.

Next, Socials Heading. In this section, you can create a social heading and add different social media items under it.
You can choose to put the icon at the beginning or the end of the page using the Icon Position dropdown.
Next, move on to the Repeater section. You can add multiple Social items. For each item, you can set text, icon, and a URL.
By default, you’ll see one repeater item under the Items section. Open it.
In the Text section, you can add text to the social media.
You can add an icon or SVG to the social media from the Icon section.
Then, in the URL field, you can add the social media URL.
Then, you can click the + Add Item button to add more social items.

Next, Featured Video Heading. In this section, you can add the featured video of your site.
You will see the video feature option by enabling the Show Video toggle.
You can choose a video for your content from the Select Video section.
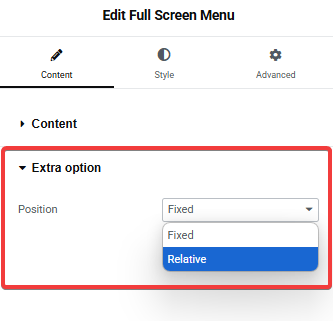
Extra Option
From the Position dropdown, you can set the menu position. Here you’ll find two options –
- Relative – To place the menu in its parent container.
- Fixed – To place the menu at a fixed position on the page.
Then, from the Style tab, you can further customize the style of the Full Screen Menu.