With this widget, you can add a beautiful testimonial carousel.
Required Setup
- Elementor FREE Plugin installed & activated.
- You need to have the WDesignKit plugin installed and activated.
- Make sure you’ve created an account and logged into it.
- Make sure you’ve downloaded the Review Testimonial Carousel widget.
How to Activate the Review Testimonial Carousel Widget?
Go to
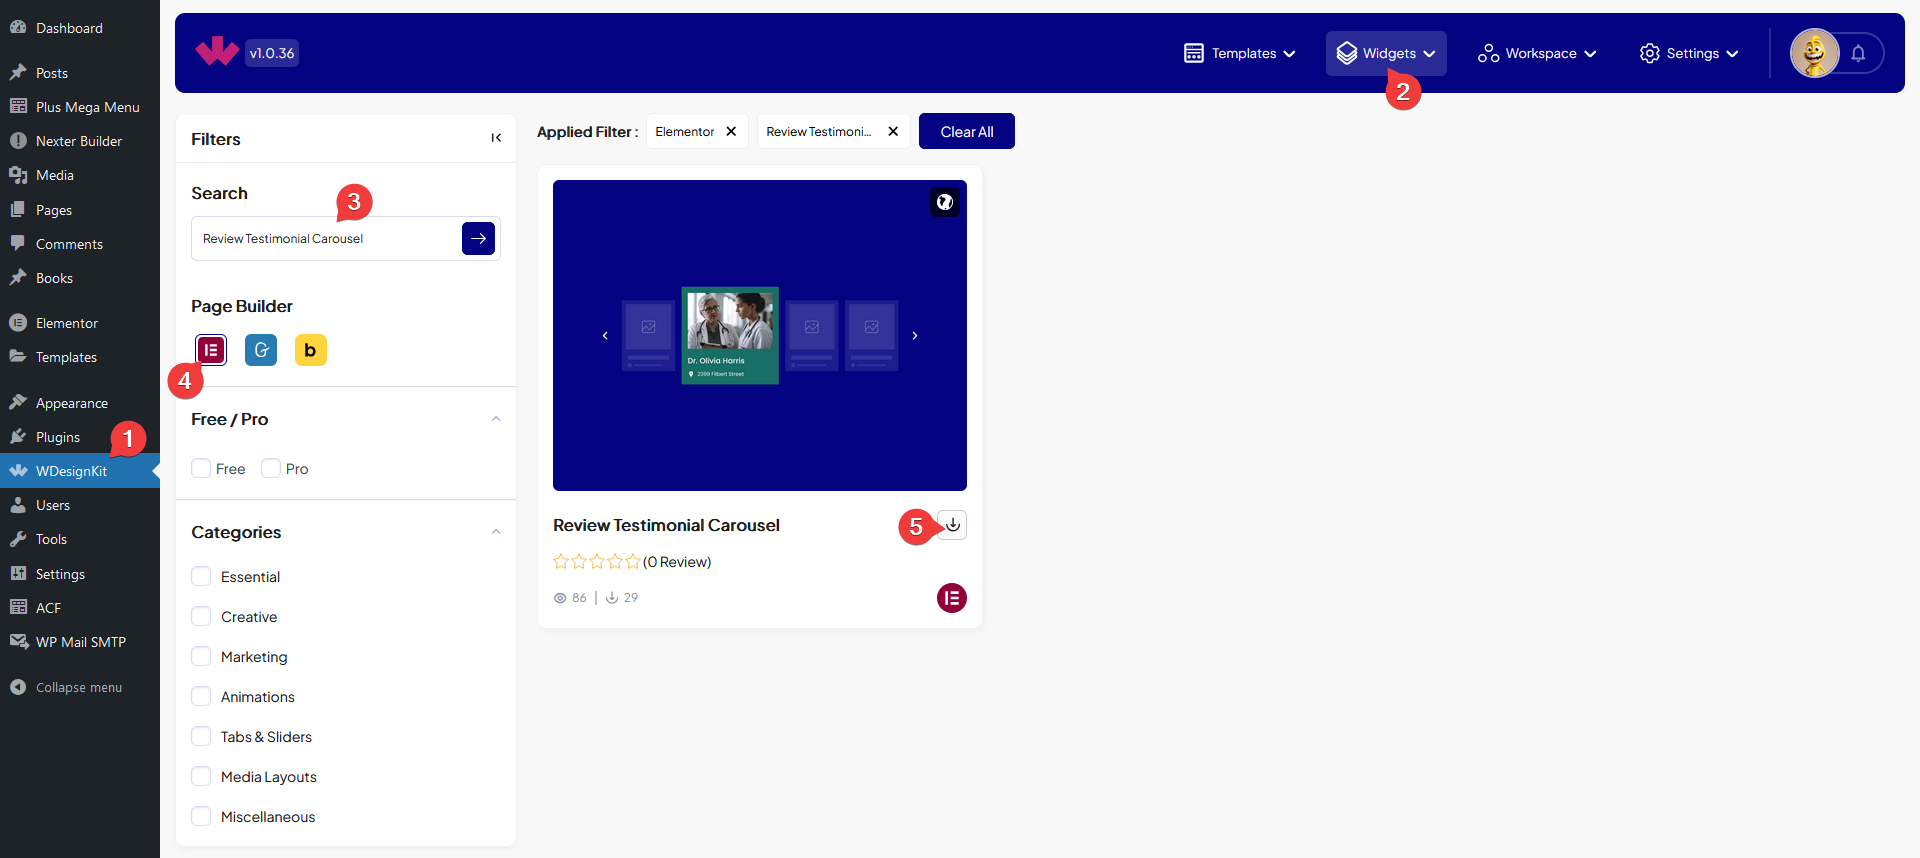
- WDesignKit → Widgets.
- Search the widget name and select Elementor as the Page Builder.
- Click on the Download icon.

How to Use the Review Testimonial Carousel Widget in Elementor?
Add the Review Testimonial Carousel widget to the page.
Content
From the Add Item section, you have to add the review items. By default, you’ll find one item, open it.

In the Select Image section, you have to add the thumbnail of the testimonial item.
In the User Name field, you can add the name of the testimonial provider.
Then in the Location field, you can add the location.
From the Select Icon field, you can add an icon beside the location.
From the iFrame Link field, you can embed a website, video etc. as a testimonial.
Note: To embed a YouTube video you have to add the YouTube embed code.
Then you can add a rating from the Star Rating section.
From the Content 1, Content 2 and Content 3 sections you can add three different descriptions in the testimonial item.
You can click on the +Add Item button to add more testimonial items.
Item Info
From this tab, you can edit the labels of Content 1, Content 2 and Content 3 sections and add icons to them.
Separator
From the Text field, you can edit the text in between the separator line.
Extra Option
You can set the number of columns of testimonial thumbnail items for desktop, tablet and mobile separately from the Desktop Column, Tablet Column and Mobile Column sections respectively.
