With this widget, you can display your products in a clean, interactive slider that feels smooth and modern. It’s ideal for showcasing drones, cameras, tech accessories, or any featured items you want visitors to notice. You can customise each slide with images, titles, pricing, descriptions, and call-to-action buttons to match your layout and style.
Required Setup
- Elementor FREE Plugin installed & activated.
- You need to have the WDesignKit plugin installed and activated.
- Make sure you’ve created an account and logged into it.
- This is a pro widget. A valid WDesignKit Pro license is required to access and use them.
- Make sure you’ve downloaded the DJI Product Slider widget.
How to Activate the DJI Product Slider Widget?
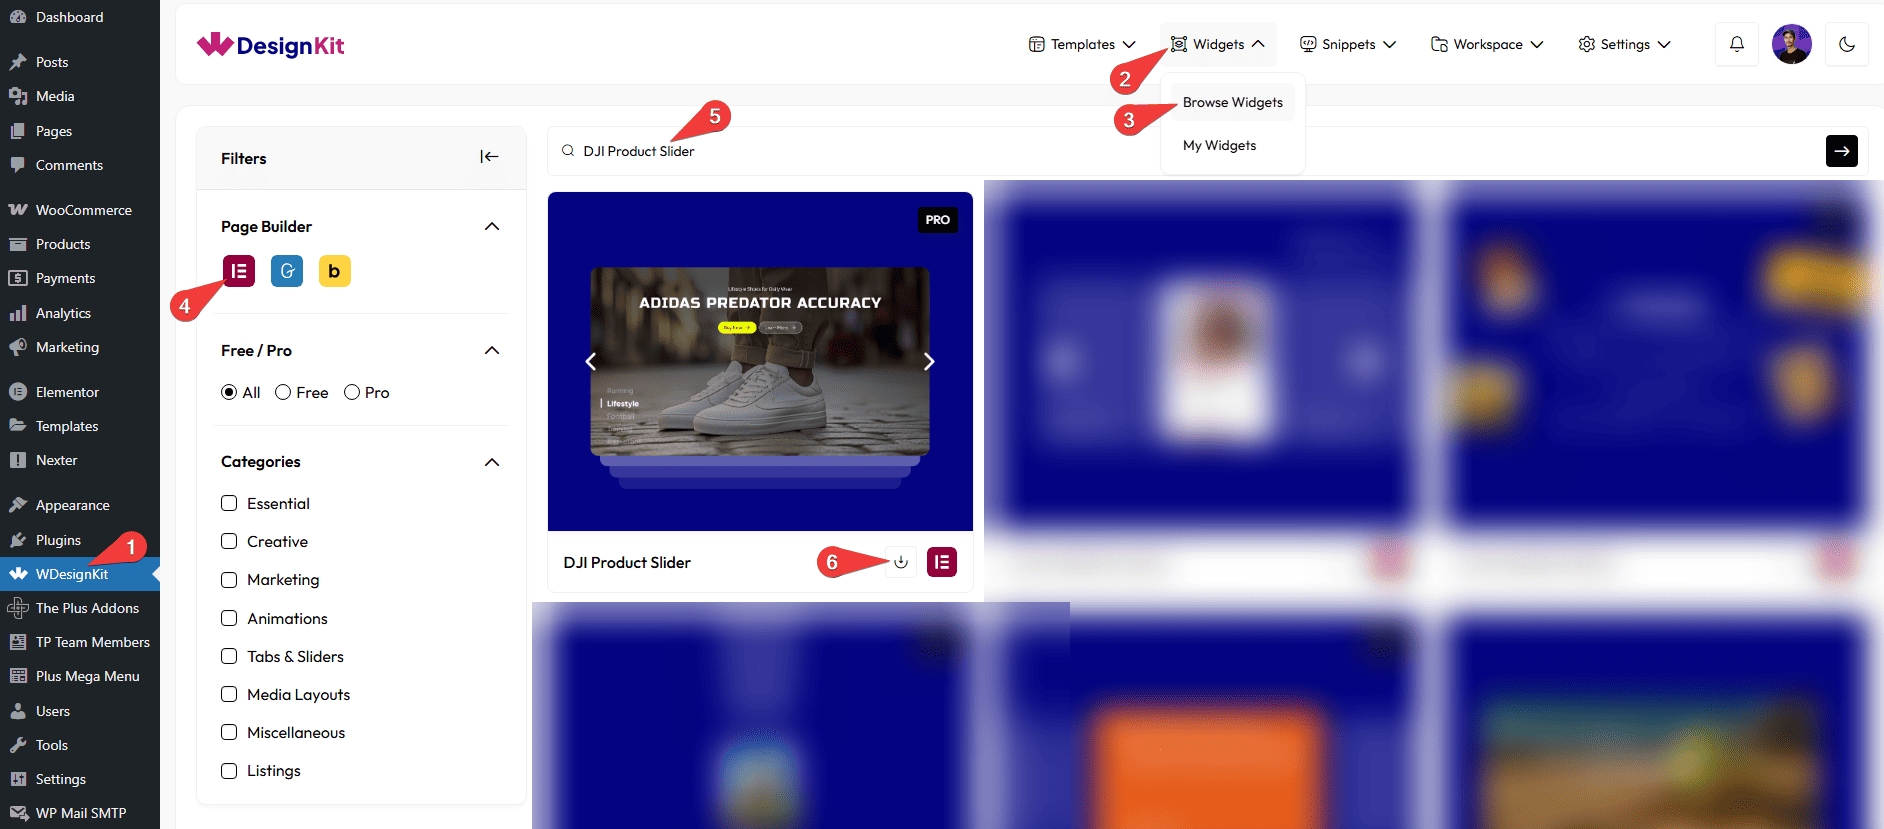
Go to
- WDesignKit → Widgets → Browse Widgets.
- Search the widget name and select Elementor as the Page Builder.
- Click on the Download icon.
How to Use the DJI Product Slider Widget in Elementor?
Add the DJI Product Slider widget to the page.
Layout
You can select a pre-defined style from the Style dropdown.
Note : From this tab, based on the style you selected, you will see different options to add the content.
Content
From the Slides section, you can add the list items. By default, you’ll find five repeater items; open it.
In the Caption field, you can add the caption of the slide.
In the Title field, you can add the title of the slide.
In the Button Text field, you can add button text to the slide.
From the Select Icon section, you can choose either an icon or an SVG for the button.
In the URL field, you can add the button URL.
Note : The above fields are only for Button 1, and similar options are available for Button 2 as well.
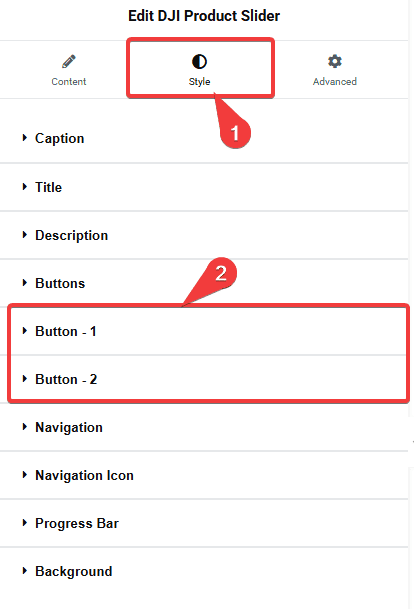
Note : We have two different individual button styles, which you can use from Style → Button-1 and Button-2.
By enabling the Full Item Link toggle, you can set a link for the entire item.
In the URL field, you can add the full item URL.
In the Navigation Text field, you can add navigation text to the bottom of the slide. With this control on the slide, you can add navigation text to the bottom of the slide. With this navigation text, you can change the slides.
From the Select Image section, you can choose either an image or an SVG for the slide.
You can click on the + Add Item button to add more slides.
Navigation
You can add an icon or SVG for the previous navigation button from the Prev Icon section.
You can add an icon or SVG for the next navigation button from the Next Icon section.
Extra Options
By enabling the Progress Bar, you will see a progress line at the bottom of the slide, left side of the navigation text.
Note :The progress bar will work only in Style-1, and only when Autoplay is enabled.
By enabling Autoplay, the navigation text will move automatically.
From the Slide Duration section, you can control how long each slide stays visible.
Note : Set duration in seconds for change slide.
Then, from the Style tab, you can further customize the style of the DJI Product Slider.