With WDesignKit, you have the ability to share your templates with the wider community of WDesignKit users. Sharing your templates publicly allows others to benefit from your creative designs and use them in their projects.
In the private mode only you can access the template, to make the template available for other users of the WDesignKit, you have to make the template public.
Requirement – This feature is a part of The WDesignKit, make sure it’s installed & activated to enjoy all its powers.
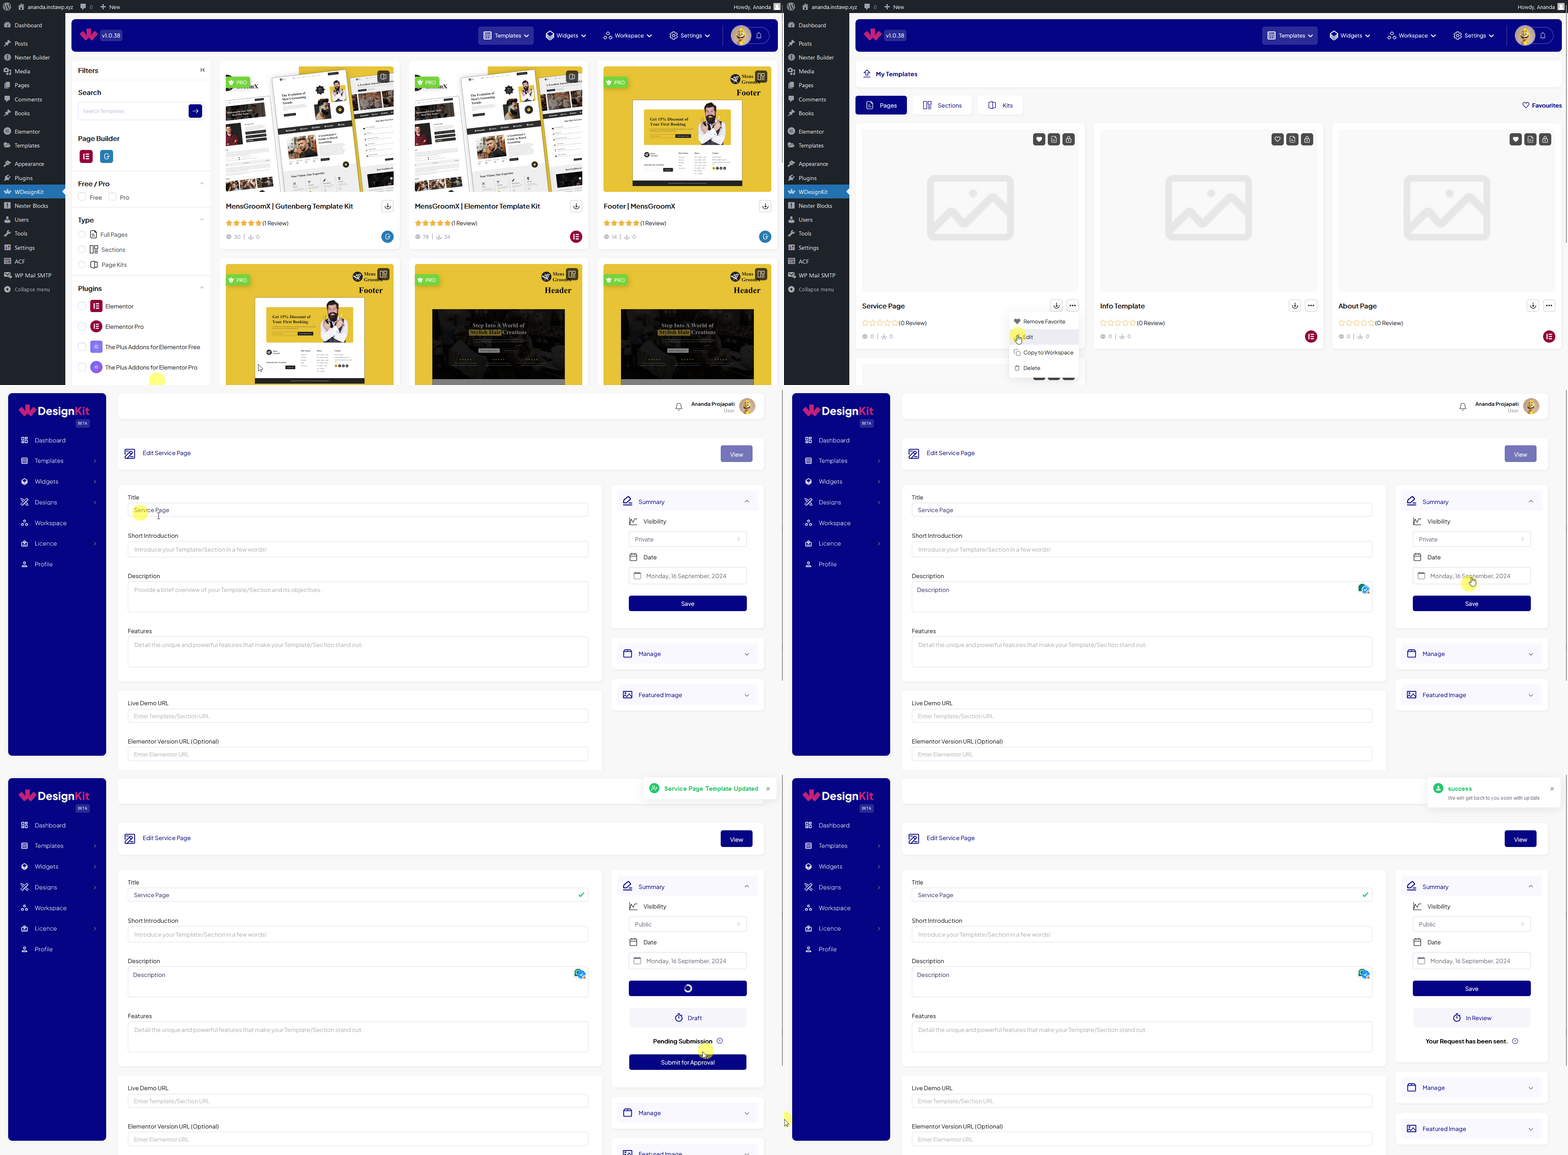
In order to make your template public go to Templates > My Templates page, here you’ll find all your saved templates.
Go to the template you want to make public, click on the three dots, and then click Edit.
It will take you to the WDesignKit app page, where you can edit the template information.
To make a template public make sure the Title and Description fields are filled.
Then, select Public from the Visibility dropdown and click on the Save button.
Now you’ll see the Submit for Approval button activated, click on it.
Your template will be sent for approval once the admin approves the template you’ll get an approved message on this page.
But if it is rejected you’ll see a rejected message, you can edit the information and again send it for approval.

Once your template is approved it will be available to all the WDesignKit users. If you go to the Browse page, you’ll be able to see your template.
Note: For some reason If you make an approved template private and again make it public you don’t have to send it for approval.
You can do the same from the WDesignKit app as well, once you’re logged in to your account and then go to Templates > Uploaded.
Go to the template you want to make public, click on the three dots, and then click Edit.
Then, follow the same steps as mentioned above.